How to Make Mashed Potatoes
There are many ways to mash potatoes. Here's a favorite way!It's no secret mashed potatoes taste best when they're made with lots of cream and butter, and we don't skimp here. But keep in mind, you can use as much or as little butter and cream as you like.
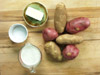 1. We used a blend of red and russet potatoes. This combination creates a slight texture variation. If you prefer completely smooth mashed potatoes, this method still applies, but russet or Yukon Gold potatoes--with their high starch content--are the best mashers.
 We used 6 potatoes, 1 cup heavy cream, 1/2 cup salted butter, and salt to taste.
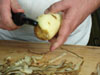 2. Peel the potatoes, removing as many of the eyes as possible with the tip of your peeler. (If you prefer more rustic mashed potatoes, keep the skin on half of them.)
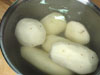 3. Submerge the potatoes in a bowl of cold water to keep them from turning brown while you are chopping them.
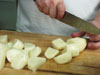 4. Cut the potatoes into similar-sized chunks so they will cook evenly: the cubes should be about 1½ to two inches wide.
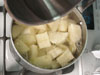 5. Use a pot large enough to hold the potatoes with enough water to cover. Add salt, if desired. Place the pot over a high heat and bring the water to a boil. Reduce heat to simmer.
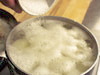 6. Simmer, covered, until tender--about 15 to 20 minutes. A knife tip inserted into a potato should meet no resistance; if the potato clings to the knife, the potatoes need to cook longer. When potatoes are done, remove from heat and drain immediately.
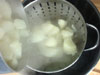 7. Reserve the potato water if you would like to use it in place of butter or cream when mashing, or if you plan to make a vegetable soup stock or sourdough bread.
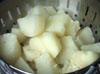 8. Let the potatoes sit for a minute to dry and to allow any excess water to drain from the bottom of the colander. Meanwhile, heat the butter and cream in a small saucepan at a low temperature. (You can also use the microwave for this step.)
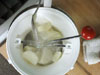 9. We used a food mill to make these mashed potatoes. A food mill or potato ricer are probably the best tools for mashed potatoes, as they won't over-mix, which can result in a gluey texture. Other tools work just fine, however--but the finished product might not be as smooth and fluffy.
 10. A ricer or mill ensures that once the potatoes have passed through the grate at the bottom, they'll be lump-free: the potato is forced into small “grains” like rice. The biggest drawback with using electric mixers is that they can overwork the potatoes to the point where the starch molecules break. Use care: mix the potatoes enough to avoid lumps, but not so much that they take on a sticky, gummy consistency.
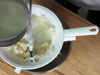 11. Once the potatoes have been passed through the mill, drizzle half of your hot cream through and around the grate to get every last bit of potato. Clean off the bottom of the ricer, and add any additional mashed potatoes to the bowl you have been working in. Gently stir in the remaining butter and cream.
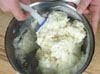 12. At this point, taste the potatoes for seasoning and adjust to taste. Test for consistency, too: if the potatoes are too thick, add more cream. Other herbs and spices can be added at this point as well--chopped chives, Italian parsley, Parmesan cheese, crumbled bacon, roasted garlic, chopped scallions, or creamed leeks are all delicious additions.
13. To reduce the fat content of traditional mashed potatoes, use low-fat sour cream in place of butter, and milk or broth rather than cream.
http://allrecipes.com/HowTo/Making-Mashed-Potatoes/Detail.aspx?src=mer556
http://allrecipes.com/HowTo/Making-Mashed-Potatoes/Detail.aspx?src=mer556


